
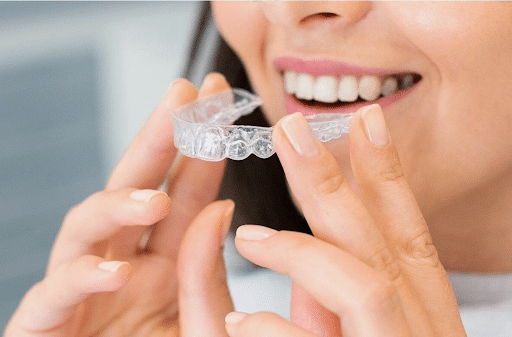
Clear aligner attachments are small, tooth-coloured bumps of dental composite bonded onto specific teeth during aligner treatment. They give the aligner something to grip, so it can push, rotate, or tilt a tooth with far more precision than a plain plastic tray ever could. Not every case needs them, whether you do depends on the type of movement your teeth require, and that’s a decision your orthodontist makes after assessing your bite and crowding pattern.
This guide explains what attachments look like, why they’re used, when plain aligners are enough without them, and what placement, removal, and day-to-day care actually involve, so you know what to expect before committing to treatment.
Key Takeaways
- Clear aligner attachments are tooth-coloured composite shapes bonded to teeth, giving aligners a grip point for controlled movement.
- They’re used for rotations, extrusions, tipping, and other movements that plain aligners struggle to manage alone.
- Not everyone needs them. Simple crowding or spacing cases can sometimes proceed without attachments.
- Placement and removal are quick, painless in-clinic procedures done at Mount Elizabeth by a specialist orthodontist.
- A consultation with a specialist ($80 before GST) is where your orthodontist decides whether attachments suit your case.
What Are Clear Aligner Attachments?
Picture a tiny, tooth-coloured bump stuck onto the surface of a tooth. That’s essentially what an attachment is. It’s made from a composite resin, the same tooth-coloured material used in fillings, and it’s bonded directly onto the enamel.
On their own, aligners are smooth plastic trays. They fit snugly, but they have limited ways to “hold onto” a tooth to move it in a specific direction. Attachments change that. They act as anchor points, or handles, giving the aligner something firm to push or pull against.
You’ll often hear them called aligner buttons or invisalign attachments, since Invisalign popularised the format. Functionally, they all do the same job regardless of brand: they improve grip and force transfer between plastic and tooth.
What Attachments Look Like and Where They Go
Attachments are usually placed on the middle third of the visible (facial) surface of a tooth, though your orthodontist may position them elsewhere depending on the movement needed. Shapes vary:
- Rectangular attachments – often used for rotation or extrusion control.
- Ellipsoidal (oval) attachments – used where a smoother profile is preferred, sometimes for comfort or aesthetics.
- Bevelled attachments – shaped with an angled edge so the aligner slides on more easily, reducing pressure during the first day of wear.
Because they’re tooth-coloured, most people don’t notice them in everyday conversation. They sit close to the shade of natural enamel and blend into the tooth surface once bonded.
Key insight: Attachments aren’t a sign that your case is complicated or “worse” than someone else’s. They’re simply a biomechanical tool that gives the aligner a better grip for the specific movement your tooth needs.
Why Orthodontists Use Attachments
Clear aligners move teeth by applying gentle, continuous pressure through the plastic tray. That works well for simple tipping movements. But some tooth movements need more targeted force, and that’s where attachments earn their keep.
Attachments help with:
- Rotations – twisting a tooth back into alignment, particularly on rounder teeth like premolars.
- Extrusion – pulling a tooth down further into the arch, which is mechanically harder for plain plastic alone.
- Controlled tipping and torque – managing how the root, not just the crown, moves through the bone.
- Aligner retention – keeping the tray seated snugly on the arch so force is delivered predictably, tray after tray.
Research on aligner biomechanics has found that the shape, size, and precise positioning of an attachment directly affects how efficiently a tooth moves and how predictable that movement is over the course of treatment, based on findings summarised in a peer-reviewed review of clear aligner attachment biomechanics. This is one reason attachment planning is treated as a clinical decision, not an automatic add-on.
If you’re still deciding between aligners and fixed appliances altogether, it’s worth comparing how each system handles these more complex movements. Our guide on clear aligner braces versus traditional braces walks through the trade-offs for a busy lifestyle.
Do All Aligners Have Attachments? When You Need Them vs When You Don't
A common question is simply: do all aligners have attachments? No. Not every case requires them. Whether you need attachments depends on the type and complexity of movement your teeth require, and that’s assessed case by case by your orthodontist.
When Attachments Are Usually Needed
Situation | Why attachments help | Typical movement involved |
Rotated premolars or canines | Round tooth shape makes rotation hard to grip with plastic alone | Rotation |
Tooth needs to move vertically into the arch | Plain aligners struggle to “pull” a tooth down predictably | Extrusion |
Root position needs correcting, not just the crown | Torque control requires a firmer anchor point | Torque/root movement |
Multiple teeth need to move together in sequence | Anchorage is needed to stop other teeth drifting instead | Anchorage/group movement |
When Attachments May Not Be Needed
Situation | Why plain aligners can be enough | Typical case type |
Mild crowding with simple tipping | Standard aligner pressure is sufficient | Minor alignment |
Small spacing between front teeth | Movement is straightforward tipping, not rotation | Diastema closure |
Short-term relapse correction after previous treatment | Minimal movement needed, low biomechanical demand | Minor relapse |
Very short treatment plans with few aligner stages | Limited movement doesn’t justify bonding attachments | Cosmetic touch-up cases |
This is exactly why a proper consultation matters before committing to any aligner brand or provider. A specialist orthodontist will assess your bite, crowding pattern, and desired outcome, then decide whether attachments are part of your plan. If you’re comparing providers, our overview of what to look for in a clear aligner doctor in Singapore explains what a thorough assessment should include.
How Attachments Are Placed and Removed
The Placement Process
Placing attachments is quick and doesn’t involve any drilling into the tooth. The steps are broadly:
- The tooth surface is cleaned and lightly etched to help the composite bond.
- A bonding agent is applied and set.
- A template tray, custom-made for your treatment plan, holds the composite in the exact shape and position needed.
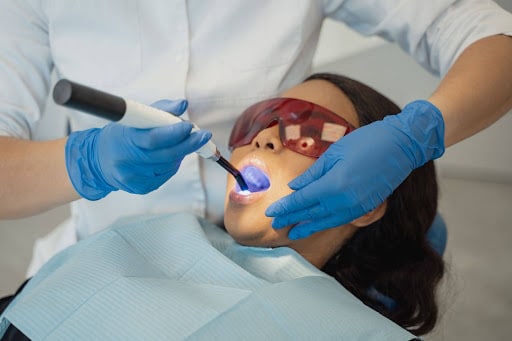
- A curing light hardens the composite in place.
- The template is removed, leaving the attachment bonded to the tooth.
The whole process typically takes a short chairside appointment, and there’s no discomfort involved, similar to having a small filling placed.
Aligner Attachments Removal
At the end of treatment, aligner attachments removal is just as straightforward. Your orthodontist uses a polishing bur to gently remove the composite and smooth the enamel surface underneath. It doesn’t damage the tooth, and most patients describe feeling only a mild vibration, not pain.
Occasionally an attachment can chip or come loose mid-treatment, particularly if you’re biting into hard foods with the tray removed. This isn’t an emergency, but it should be addressed promptly, since a missing attachment can slow progress if the tooth isn’t getting the grip it needs. Book a review with your orthodontist rather than trying to reshape or reattach anything yourself at home.
Key insight: A lost or chipped attachment doesn’t ruin your treatment, but leaving it unaddressed for too long can delay how your aligners track. Contact your clinic as soon as you notice it.
Care and Maintenance With Attachments
Living with attachments is mostly about consistent hygiene, since food debris and plaque can build up around them just as it can around any bonded surface.
- Brush after meals where possible, angling the brush carefully around each attachment.
- Floss daily. It’s the only way to clear debris from between teeth that a toothbrush can’t reach.
- Limit strongly pigmented drinks like dark coffee, tea, or red wine, since composite can stain over time.
- Rinse with water if you do have a staining drink, rather than leaving it to sit.
- Wear your aligners for the hours your orthodontist recommends each day, removing them only to eat and to clean your teeth.
Note that mouthwash isn’t something we routinely recommend as part of attachment care. Thorough brushing and flossing, done consistently, is the standard and sufficient approach for keeping attachments and aligners clean.
Roughness against your cheeks or lips in the first few days is normal and settles as your mouth adjusts. If irritation persists beyond a week or two, mention it at your next review.
Frequently Asked Questions
You can discuss this with your orthodontist, but refusing recommended attachments may limit how well your aligners can carry out specific movements like rotation or extrusion. If attachments are advised for your case, it’s usually because plain aligners alone wouldn’t deliver a predictable result for that particular tooth.
Generally, no. They’re made from tooth-coloured composite designed to blend with natural enamel, and most people don’t notice them in everyday conversation or photos. Some patients report that friends or colleagues only spot them when pointed out directly.
It’s usually not urgent, but it shouldn’t be ignored either. A missing attachment means that tooth isn’t getting the grip it needs to move as planned, which can slow your progress. Contact your clinic to arrange a review and have it rebonded.
Talk to a Specialist About Your Aligner Plan
Attachments are a small detail with a big effect on how well your treatment tracks. If you’re weighing up clear aligners and want a plan tailored to your bite, book a consultation to have your case properly assessed. Consultations run 15 to 30 minutes and cost $80 before GST. Reach out through our contact page to arrange a time at Mount Elizabeth.